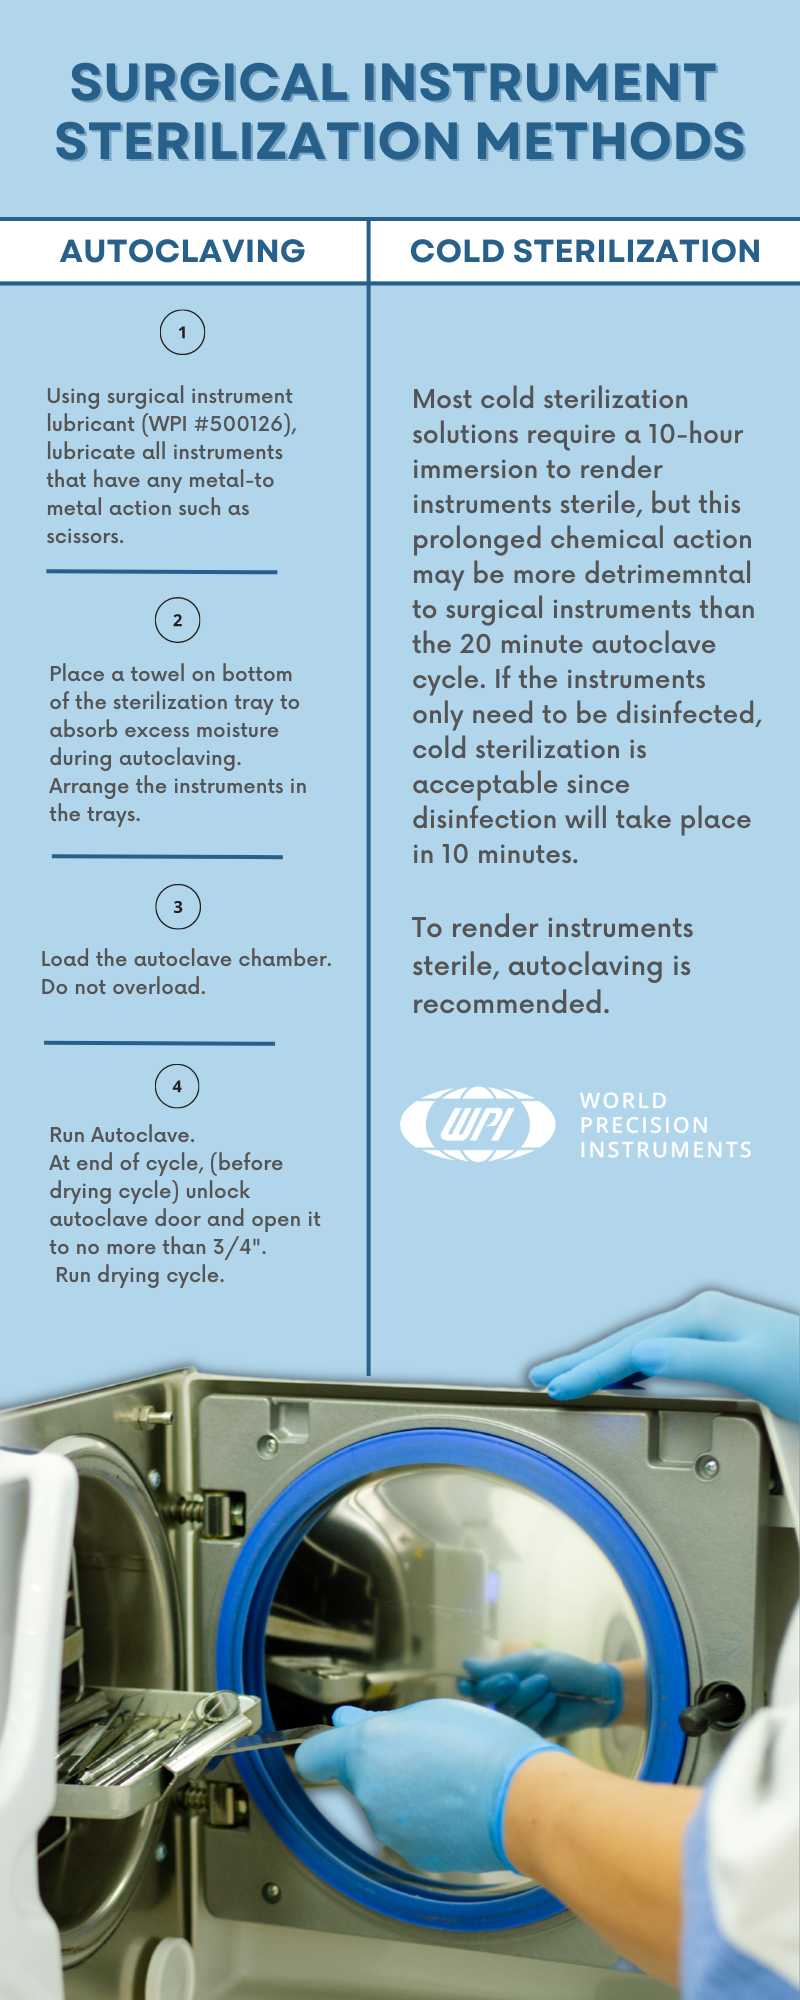
After a good cleaning and disinfection, your surgical instruments may be sterilized using a variety of methods. The chart below shows two common methods, autoclaving and cold sterilization. Sterilization destroys all microbial life. Some chemical sterilants can be used as high level disinfectants (HLD) when used for shorter exposure periods.
- You can sterilize your instruments by soaking them in a chemical sterilant like Cidex Plus® for 10 hours at 25°C. This process may be detrimental to fine instruments.
- Dry heat or autoclaving are the preferred methods of sterilizing surgical instruments. Typically, surgical instruments are sterilized by autoclaving. Autoclaving, which is saturated steam under high pressure, is the most common method for sterilizing surgical instruments. If you prefer to autoclave, instruments may be autoclaved individually or in sets.
Disposable paper or plastic pouches are ideal for autoclaving individual instruments. Use a pouch wide enough for instruments with ratchet locks, like needle holders and hemostats. The instrument needs to be sterilized in an open (unlocked) position. For sets, unlock all the instruments and sterilize them in an open position. Place heavy instruments on the bottom of the set when two layers are required. Here are a few tips to keep in mind.
- Always autoclave instruments in an open position. Locking an instrument prevents steam from reaching and sterilizing all the surfaces. And, heat expansion during autoclaving can cause cracks in the hinges of locked instruments.
- Do not overload the autoclave chamber, as this may also hinder steam penetration.
- Place a towel on the bottom of the pan to absorb excess moisture during autoclaving.
- Surgical instruments can be placed in sterilization trays or wrapped in paper or muslin before autoclaving. This helps to prevent contamination of the instruments after sterilization.
- Arrange the surgical instruments, sterilization trays or packs in the autoclave without stacking them. The steam must circulate freely inside the autoclave.
Autoclaving
- Using a surgical instrument lubricant (WPI #500126), lubricate all instruments that have any metal-to-metal action such as scissors, hemostats, needle holders, self retaining retractors, etc.
CAUTION: Do not use WD-40, oil or other industrial lubricants.
CAUTION: Never lock an instrument during autoclaving. This will prevent the steam from reaching and sterilizing the metal-to-metal surfaces. Heat expansion during autoclaving could also cause cracks in hinge areas. - Place a towel on bottom of the sterilization tray to absorb excess moisture during autoclaving. Arrange the instruments in the trays.
- Load the autoclave chamber, but do not overload it. Overloading may hinder steam penetration.
- Run your autoclave according to the manufacturer’s directions for adjusting the time, temperature and pressure of the autoclave cycle. As a general rule of thumb:
-
- Process unwrapped instruments at 121°C for 20 minutes at 15 PSI above atmospheric pressure or at 134°C for 3–4 minutes at 30 PSI above atmospheric pressure.
- Process wrapped instruments at 121°C for 30 minutes at 15 PSI above atmospheric pressure or at 134°C for 15 minutes at 30 PSI above atmospheric pressure.
At the end of the autoclave cycle (before the drying cycle) unlock autoclave door and open it no more than a crack (about 3/4”). Run the drying cycle for the period recommended by the autoclave manufacturer. If the autoclave door is opened fully before the drying cycle, cold room air will rush into the chamber, causing condensation on the instruments. This will result in water stains on instruments and also cause wet packs. Run the drying cycle as recommended by the autoclave manufacturer until all the instruments are dry. It should take about 30 minutes.
- Using sterile tongs, remove all the instruments, trays and packages. Allow them to cool to room temperature before storing. Unwrapped items must be used immediately or may be stored in covered, dry, sterile trays for up to a week. Store wrapped packages in a warm, dry, closed cabinet. Instruments remain sterile as long as the wrap is dry and intact.
Cold Sterilization
Most cold sterilization solutions require a 10-hour immersion to render instruments sterile, but this prolonged chemical action may be more detrimental to surgical instruments than the 20-minute autoclave cycle. If the instruments only need to be disinfected (clean and free of most microorganisms), cold sterilization is acceptable, since disinfection will take place in only 10 minutes. However, to render the instruments sterile (with absolutely no microorganisms surviving), autoclaving is recommended.
CAUTION: For instruments with tungsten carbide inserts (needle holders, scissors, tissue forceps), do not use solutions containing benzyl ammonium chloride which will destroy the tungsten carbide inserts.
If you have questions about your surgical instruments, contact us.


Request
Catalogue
Chat
Print